Auth0 Setup
We need to configure our new Auth0 account to set up an API, client, social identity providers, and a rule. Once we've set up Auth0 and added it to our Angular app, users will be presented with a login page to sign in:
Let's set this up! Sign into your Auth0 Dashboard to proceed.
Create an API
Create a new Auth0 API by navigating to the APIs section in the Auth0 Dashboard sidebar and clicking the +Create API button. Your new API should have the following settings:
- Name: a suitable name of your choice
- Identifier: this should be the URL for our API (cannot be changed later),
http://localhost/3001/api/ - Signing Algorithm:
RS256
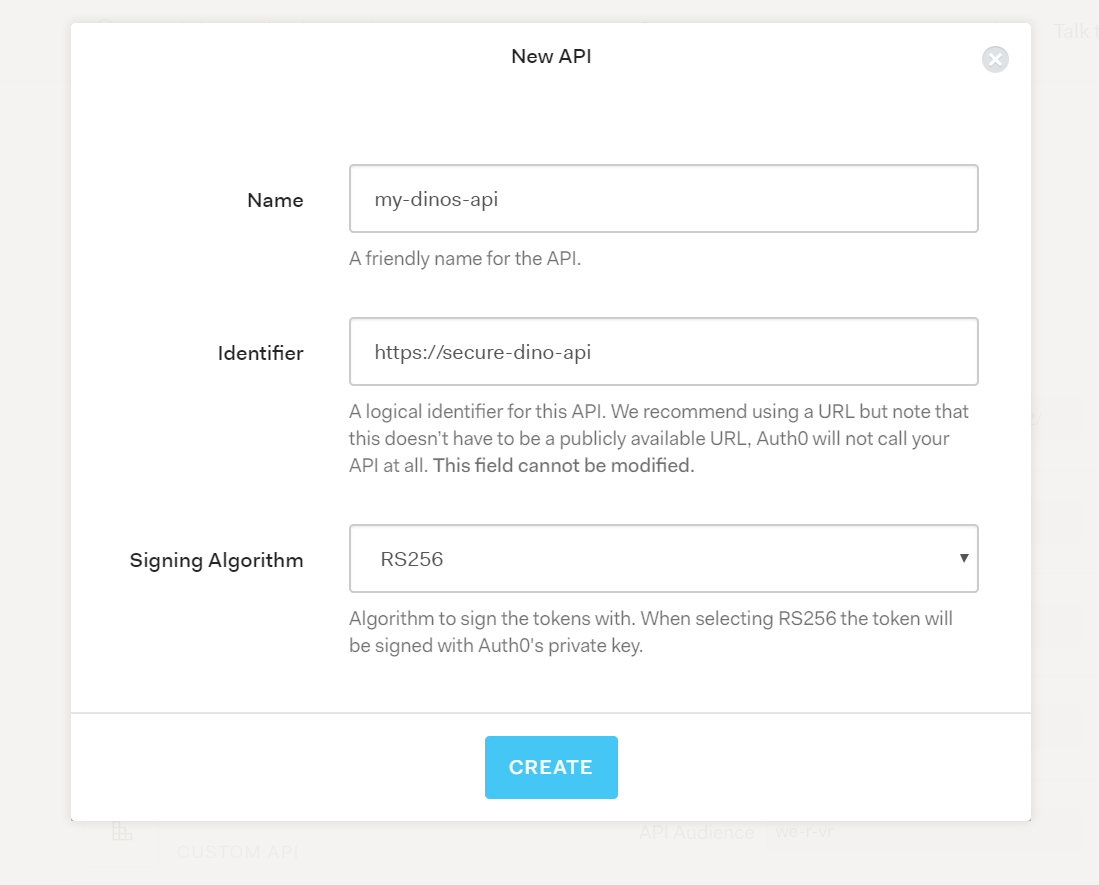
Click the Create button to save your new API. Make note of the Identifier. We will need this setting in both our Node.js API and our Angular app configuration (it will be our audience value).
Create a Application
Auth0 applications represent clients; in this case, our Angular front-end. Create a new application by navigating to the Applications item in the sidebar and clicking the +Create Application button. You should see the following screen:
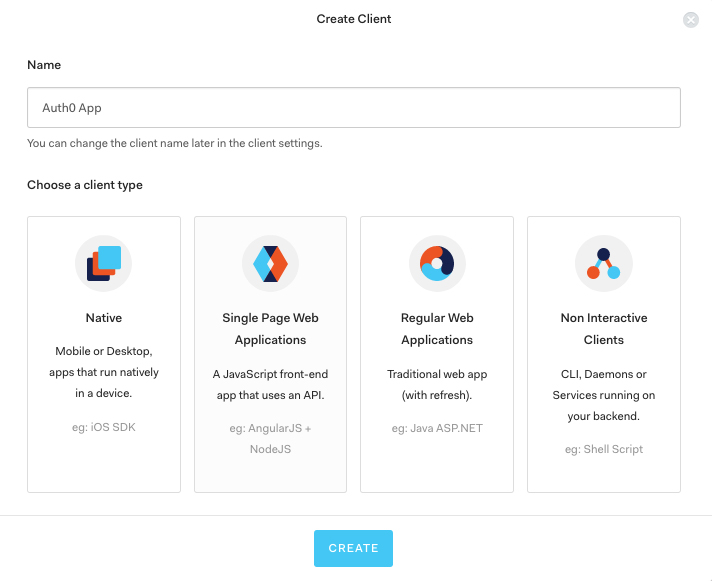
Give your new Application a suitable name (such as Auth0 App) and select Single Page Web Applications as the client type. Then click the Create button.
Once your Application has been created, select the Settings tab and make note of the Domain and Client ID. You'll need these settings to configure Auth0 in your Angular application.
Add the following configuration to the settings for this client:
- Allowed Callback URLs:
http://localhost:4200/callback - Allowed Web Origins:
http://localhost:4200 - Use Auth0 instead of the IdP to do Single Sign On:
On
Note: If you're using an older Auth0 client app that you created at an earlier date, scroll down to the bottom of the Settings tab and click Show Advanced Settings. Select the OAuth tab and verify that the JsonWebToken Signature Algorithm is set to
RS256. (New clients use this algorithm by default, but older ones may not be set.)
Set Up Social Identity Providers
You can set up social identity providers (IdPs) if you wish to allow your users to log in with providers like Google, Facebook, Twitter, and more. In the Auth0 Dashboard sidebar, navigate to Connections > Social Connections.
Switch on any social identity provider you wish you use in your app. You should not use the default Auth0 dev key. Instead, you should set up your own social provider app. You can do this by clicking a provider's How to obtain a ClientID? link.
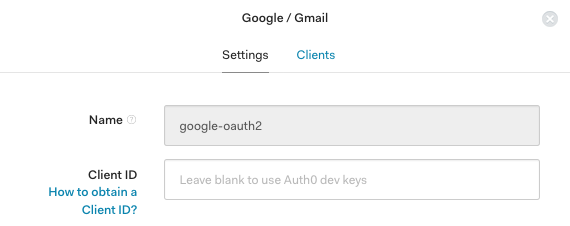
Then follow the instructions to obtain an OAuth 2.0 Client ID for that social provider and fill it in.
Important Note: Social providers using Auth0 dev keys are identified by an orange
!icon and a warning dialog in the main view. You should obtain non-development client IDs because Auth0 dev keys are not acceptable in a production environment. In addition, using dev keys will prevent silent token renewal from succeeding. Set up your own apps with the social identity providers to avoid this.
Once you've enabled a social provider and provided your own Client ID, select that provider's Applications tab in Auth0 and enable the IdP for the Auth0 application you created for this project. Save your settings.